


This new project is thanks to someone looking for a smaller, mini Tangled lantern around 4 inches tall. These instructions show you how to adapt my original DIY design to a pint-sized version. This is perfect for smaller rooms, mini string lights, or a Disney or Tangled-themed Christmas tree!
Modifying the design for the mini Tangled lantern


I also created three other color templates with the same pattern. This way, you can apply one of many color schemes to your DIY project (non-commercial purposes only, please):
If these colors don’t quite match your inspiration, you can easily change the color in GIMP!
Selecting the best materials
This variation carries the tradition of using classic linen paper, baronial ivory in color available from Amazon. You’ll also see the same materials in use matching other DIY projects on this blog. The classic linen paper is excellent quality with a nice texture, but does contain a Classic Linen watermark. Because of this, I sorted through the sheets of paper to find pieces with the watermark near the edge so it minimally interferes with the finished lantern. I learned that pages with the watermark at the top work best for these mini lanterns but, depending on how your printer orients the print out, you may want to use the watermark at the bottom. (You can also rotate the PNG image on your computer to cover any print orientation problems).
Print the pattern
I printed this mini Tangled lantern on a Mac using Preview. In order to split the letter-sized paper evenly, I found that scaling my image to 51% created the perfect split between the top and bottom patterns. You may need to adjust this on your own so consider printing a few of the images on regular copy paper before you use the higher quality linen paper!


Trim and prepare the lantern paper
First, you’ll want to split the printed lantern evenly down the length of the print.

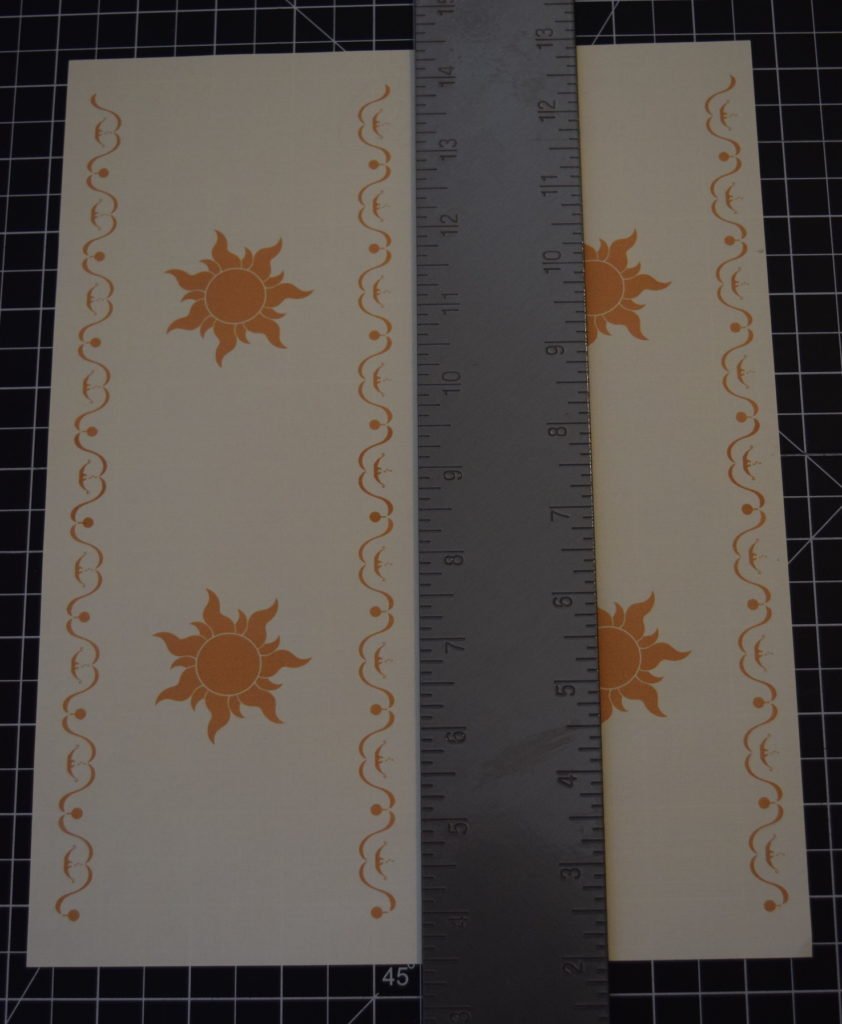
Next, trim excess paper from each of the sides of the lantern. One the excess is removed, you can optionally cut little notches out by the frying pan to allow for a cleaner transition when you form the round lantern.


Once the pattern is trimmed, set it aside.
Trim the Con-Tact paper
Con-Tact Brand Clear Matte paper, is available from Amazon and numerous other sources. An 18″ x 20′ roll will yield plenty of mini lanterns and it has measurements on the removable side to make preparation easier.


Once trimmed, our mini lanterns are a little smaller than 10″ lengthwise so I recommend 11″ for each lantern. The contact paper numbering resets after 18″ so if you want to simplify the math process, you can always trim the first strip at 18″ and measure from there. Alternately, you can cut your contact paper in 4.25″ strips, matching the height of your mini lanterns.


Apply Con-Tact paper to the back
Now that you have your Con-Tact paper roughly trimmed, you may place one of the lanterns pattern-side down. Next, separate a corner from the peel-off backing on the Con-Tact paper and apply it to the back of the lantern as pictured. You want to start 1.5″ inches from the edge to allow for your linen paper overlap when you glue the pattern in the round shape.


Tip: You may find it easier to keep the bubbles away with a straight edge! If you don’t have one handy, use the back of your hand as you slowly and steadily apply the Con-Tact paper to the back of the lantern.

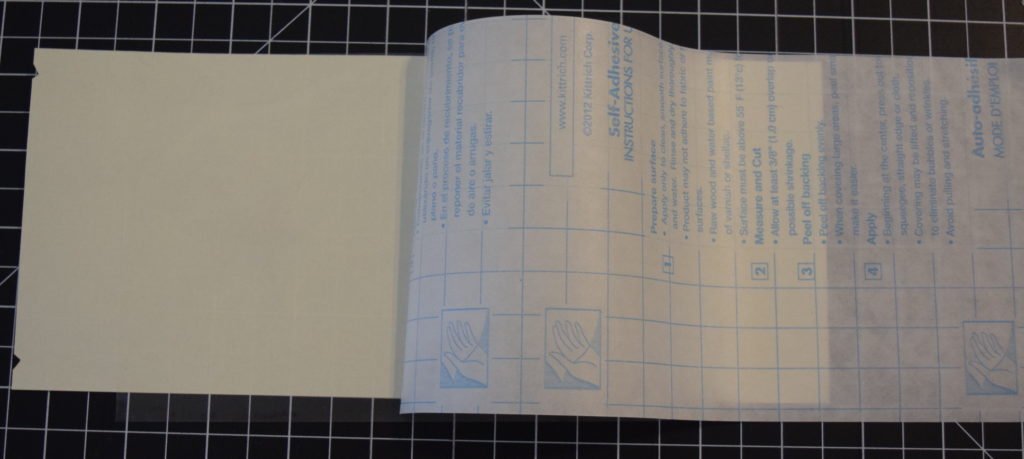
Trim the removable backing but leave at least 3 inches of peel-off backing on the right side to allow for overlap on the inside of the lantern. This will become clearer once you shape and glue the lantern in the coming steps.


Shaping the mini Tangled lantern
Flip the lantern, pattern-side up.


Shape and glue the mini Tangled lantern
Apply your glue stick to left side on top of the pattern, along the edge and approximately 1 inch in from the left side. (I like Elmer’s disappearing purple and gel glue sticks best.)
Then, apply the glue stick on the blank back of the right side of the image pictured above. Once glue is applied to both sides, shape your lantern, allowing for the Tangled boat to overlap once (approximately 1.5 to 2 inches).


You’ll notice a little overlap of contact paper along the bottom of the lantern. Depending on how careful you were placing the contact paper, there may be some at the top too. It’s pretty easy to trim the contact paper with scissors so I recommend holding the lantern with your non-dominant hand. Then use your dominant hand to guide the scissors along the edge of the lantern, slowly trimming away the excess. The scissors will run smoothly along a single layer of Con-Tact paper. You may have to cut when you reach an overlap of two layers. Be careful because you do not want to cut your lantern’s linen paper as you perform this action!


Stand your lantern up, slightly reshaping the glued portion to ensure it matches the round shape of the lantern and preventing the glued edges from drying flat.


Finalizing the mini Tangled lantern shape
While the glue dries, I cut and shape the 1.5 mm wire for the top and bottom of the lantern. Round mini lanterns require 8-5/8 inches.


If you want to play it safe, you can always cut the wire a little longer and trim it to fit inside the lantern as they are shaped.
The bonsai wire is easy to work with but some may find that it is too flexible. If you prefer, you could use a wire with increased rigidity such as an alternate plant-shaping wire or a wire coat hanger. I prefer the bonsai wire because you can be reshape it as needed and it complements colors in the lanterns. For these mini lanterns, if you don’t like the 1.5mm wire, consider the stronger 2.0mm wire.
Shape the wire
To complete the wire shape, I found it easiest to first tape the wire together in a circle, then following up with another piece of tape on top of the seam for extra strength.
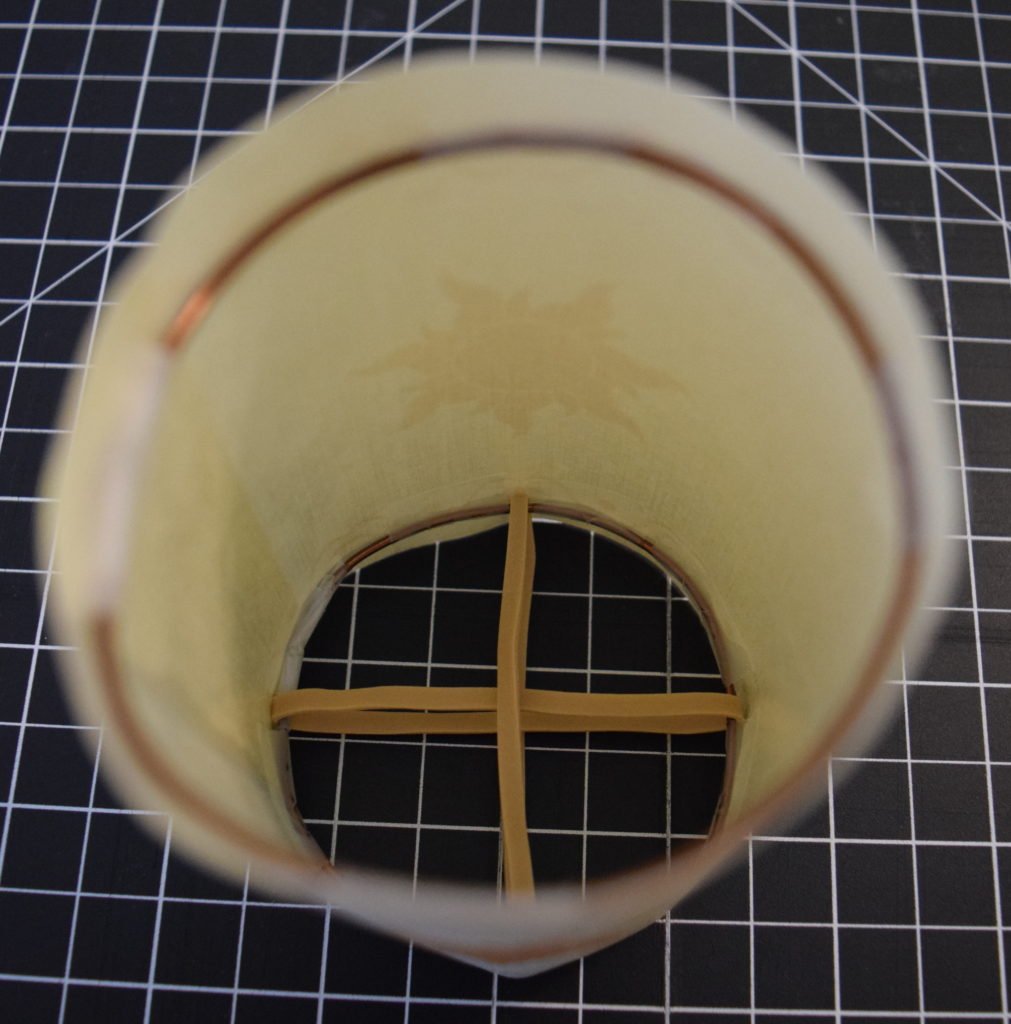
Once you form the top ring, you’ll want to place two rubber bands on the wire that cross evenly across the center. The rubber bands in the photo below are #32 to match my other DIY kit. If you find smaller rubber bands that fit better, let me know what you use!


Secure the wire
When you place the top wire in the lantern, I find it easiest to apply tape on either side of the rubber band so you’ll need eight pieces of tape. I start by holding the wire just above the printed border line, first taping over the taped wire seam and then taping the opposite side for optimum placement.


As you apply the remaining six pieces, slowly reshape the wire and lantern for the best visual appearance of the lantern.
Repeat the process for the bottom wire
The bottom wire can be made from the same 1.5mm bonsai wire.
Structurally, the bottom wire helps the round lanterns keep their shape. Since it doesn’t have any rubber bands, you may form it in the same fashion as the top wire and affix with four evenly-spaced pieces of tape.


Now presenting your mini Tangled lantern
Congratulations! You just completed your first mini Tangled lantern!


You should be able to hang the mini Tangled lanterns on mini LED string light kits such as those readily available around Christmas.
Don’t have time to Do It Yourself? That’s okay because you can buy these mini Tangled lanterns on Etsy! If you don’t see the mini lanterns in an available listing, simply send me a custom order request.
Caution & Disclaimer
Caution: The lanterns are made of linen paper and reinforced with contact paper. They are designed for indoor use only with LED light bulbs. Do not use these lanterns outdoors or with an incandescent light bulb or with candles because it increases the risk of the paper lantern catching on fire.
Disclaimer: The Walt Disney Company maintains the copyright for Tangled, Disney’s Rapunzel, the Tangled golden sun, Walt Disney World, and the Magic Kingdom. I do not own nor claim any copyrights to these items. Rather, this project is inspired by the creativity and innovation of the Walt Disney Company through their depictions in the movie and at the Magic Kingdom. Thank you, Disney, for bringing magic into all of our lives.